
DIY - the next level part II
The summer of 2021 is almost over and so is my little DIY tiny house/bedroom/office project (if something like this ever finishes completely). It has been a great time for me. I have learned a lot (and failed sometimes) and just enjoyed the process. I have worked as many hours a day as my child and job (in that order) would allow but whenever I didn’t enjoy the work I would take a break – it was supposed to be a fun project.

In a previous blog (https://www.ukraineinsideout.com/en/page/blog/diy-the-next-level) I showed how the foundation and the floor was made. After this we went to Denmark for 6 weeks and when we got back this was what I saw…

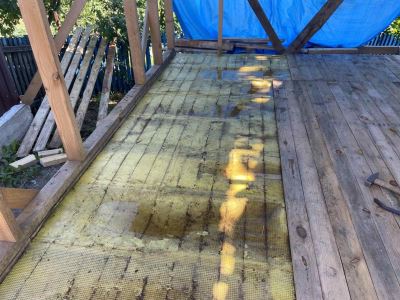
I had made a “tent” to protect the floor but it had been blown apart and even though my father-in-law had tried to cover it everything was soaked.
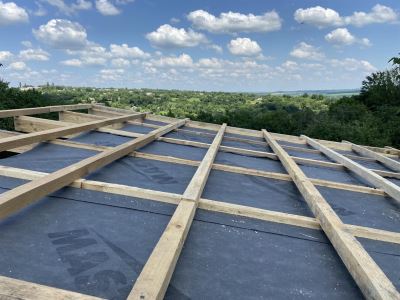
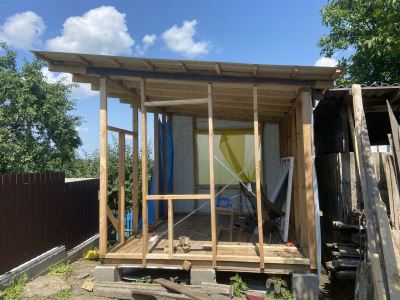
Fortunately, I could redo the floor without taking down the walls (except for 4 simple supports at the end walls). I did the floor one more time. But before this I did the roof – with the roof in place it is so much easier to protect the floor from rain… The second version of the floor was done without the plastic barrier on the upper side but with a breathable barrier below the insulation instead (the same way as I later constructed the walls and the roof).
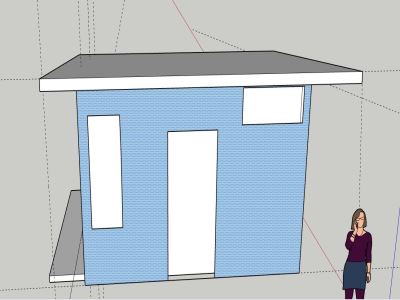
Two of the walls (the two carrying the roof) were built laying down on the floor platform and then raised into position afterwards. The lower one was simple since it doesn’t have any windows (it would have been nice with windows to get some morning sun but there is less than 1 meter to the shed standing next to it. In the taller wall I had some kind of idea about where the door and windows should be but no clue about the actual size so I just left big “holes” in the construction and then later added the windows.

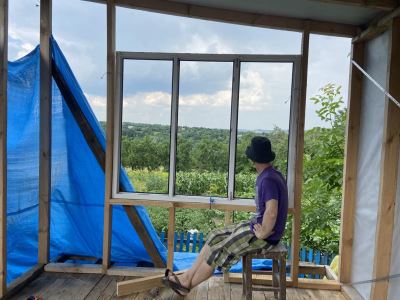
The two end walls where build piece by piece between the two existing walls and the roof and floor. When I build them I already knew the dimensions of the windows (both were already used – one I got from my father-in-law and one we bought from a flat owner who wanted to upgrade to something better – around 50 $ for a 180x138 cm window in 3 sections where the middle one can be opened).
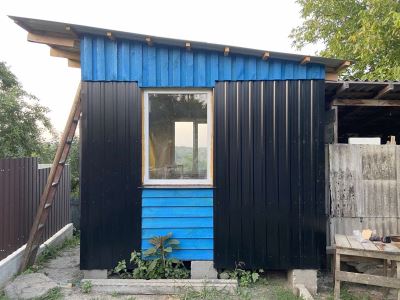
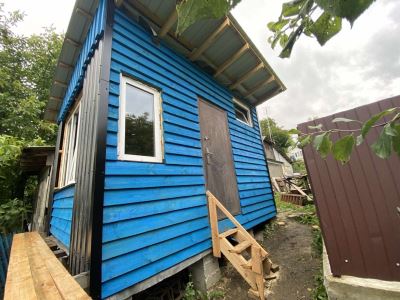
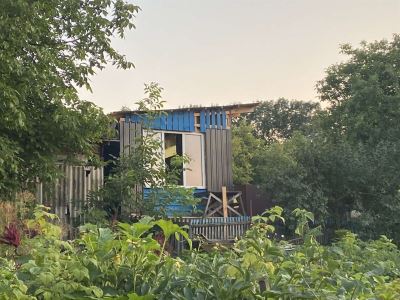
The outside siding of the walls is plastic coated sheet metal (I have no idea about the correct term in English). It is relatively cheap and fast to install and doesn’t require any maintains – on the other hand is very sensitive to scratches and not very charming to look at. So we decided to go with a combination of this and then wood. The lower wall is done completely with this black coated metal (no one sees it). The tall wall where the door is and where we will be walkimg back and forth is done entirely in wood. To protect the wood from rain the roof has a very long overhang. The two end walls are done in a combination of both materials.


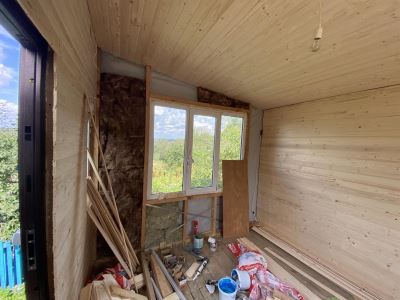
The floor, the roof and the walls are insulated with 100mm Rockwool or 100mm fiberglass. The rockwool I got from a friend (it is used in the floor and the roof and the left over in the walls) and fiberglass was what I could get in the nearby town where we bought the building supplies. So 100mm thickness of insulation was chosen because that was what I had but also because the dimension of the wood (10X5 cm) was what I could easily get my hands on. I would have loved to build a super warm insulated house (which would require 300mm) – but since we will not be using it in the winter months it is probably fine with the 100mm.
The door I also got from my father-in-law. It required a bit of love (it was very difficult to open) and we probably will have to paint it since it is not very pretty – or even better cover it with something. Also to get a little insulation since the door is just metal with air between (so it is not really insulating).
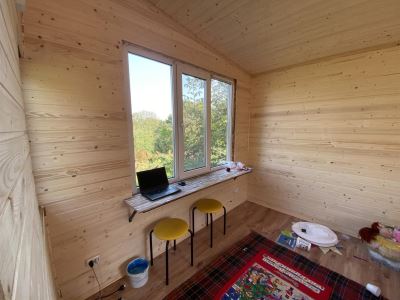
First I wanted to cover the inside walls with OSB panels (and paint them white) – I just wanted to do this to save money 😊 – but I found out that this wood cost almost the same. It looks 10 times better and is also (I presume) much easier to work with.

For the floor we chose laminate. It is durable, easy to install (though I had problems in the beginning to join the sections together) and cheap. The only problem with laminate vs real wood is the thermal conductivity. Which means that if the floor is cold so are your feet – on a real wooden floor you don’t feel it the same way. Well this problem can be solved with woolen socks or a rug on the floor.
The house turned out pretty small – well I should have known 😊 But when I made the floor it was almost 12 m2 but when I measure the inside now with the inside walls installed it is only 2.87x3.68m which is 10.5 m2.

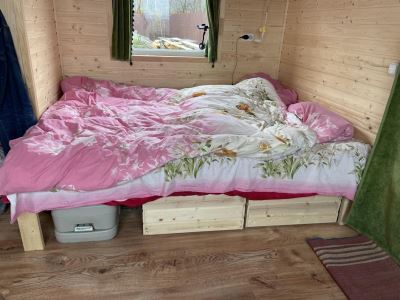
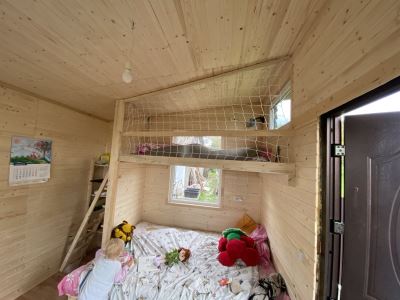
To utilize the space the best way the furniture should be constructed especially for the house. Here is the sleeping section (will probably also be used as a couch and a place for my daughter to play). The lower bed is 200 cm x 140 cm and the upper bunk is 125 cm at one end and only 80 cm at the other end. I didn’t want to upper bunk to be so dominating and therefor chose this solution. At the end of the beds there are some shelves as well as the ladder to get to upper bunk.

Under the bed we have two big boxes for storage (mostly toys) and the toilet for my daughter and for the adults at night in case of emergency.

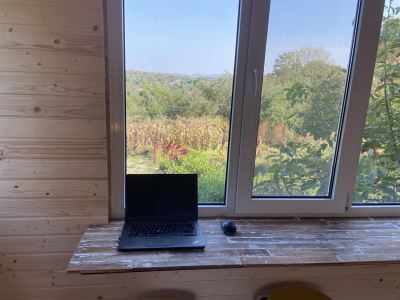
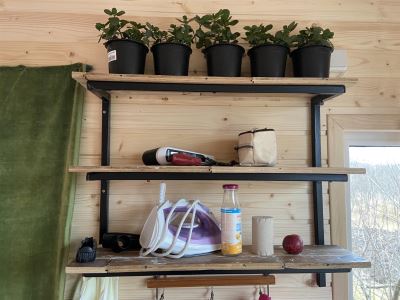
Under the big (panorama 😊 ) window I wanted a broad window sill that can also be used as a table. In one of the sheds here I found some old parquet floor. I glued it together and painted it a bit to lighten it up and then sanded it again. I really like the colors and the contrast to the wood. I used the same to build some shelves.


As I wrote in the beginning I really enjoyed the process so if you want to have a little house like this and you live somewhere where the temperature in December, January and February is above 20 deg Celsius then I will be happy to come and help you build a house – I work for food and accommodation (for 2 adults and a little child 😊 )
related blogs
DIY – the next level!
Last year during the corona lockdown I wrote a little blog post about our DIY playground that I made in the garden next to my wife’s family’s house in the village – a little project that should keep me busy for a little time and after that my daughter busy for a long time. She real
Staycation in the Ukrainian countryside – DIY playground almost for free
A John Lennon quote goes something like this: “Life is what is happening to you while you are busy making other plans”. In 2020 in the Covid-19 time this is truer than ever. I think a lot of us had plans for 2020 that had to be modified one way or another. For me and my family this defin